

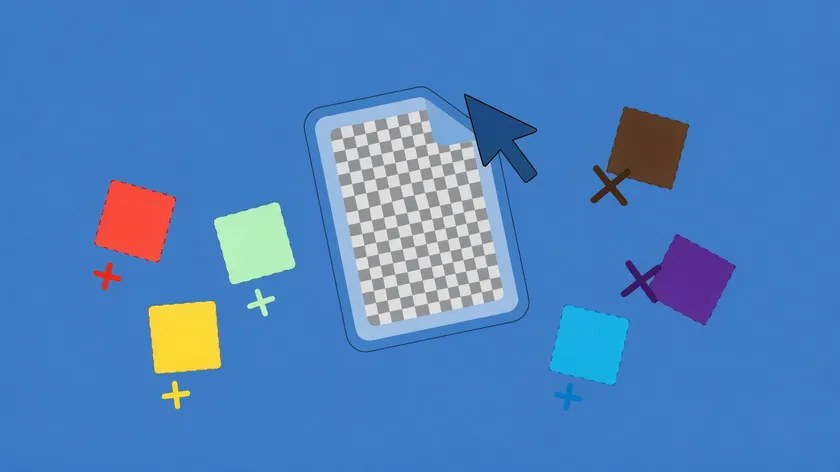
Making an image transparent online means removing the background or specific colours so the image can be placed over other content without a solid backdrop. Free online tools make this process quick and accessible for presentations, websites, social media, and design projects.
This guide explains the best free ways to make an image transparent online, step-by-step methods, and tips for cleaner results.
Quick answer: To make an image transparent online for free, upload it to a background remover such as Adobe Express, remove.bg, Canva or Photoroom, let the tool erase the background automatically, then download the result as a PNG file. PNG keeps the transparent areas, while JPG does not support transparency and will fill them with a solid colour.
What Does Making an Image Transparent Mean?
A transparent image has areas with no colour or background, usually saved in formats such as PNG. This allows the image to blend naturally when placed over different backgrounds or designs.
Common uses include:
- Logos
- Product photos
- Icons and graphics
- Social media content
- Website elements
Best Free Ways to Make an Image Transparent Online
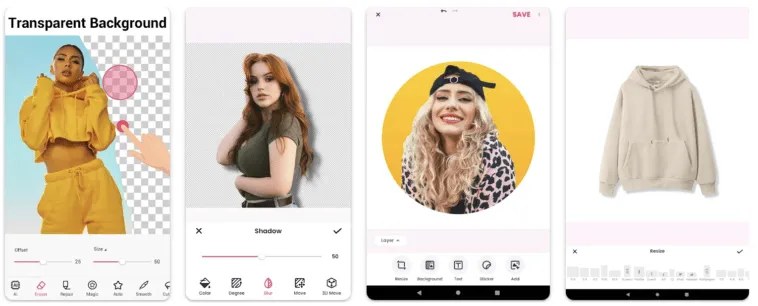
1. Online Background Remover Tools
Websites that automatically detect and remove backgrounds using AI. These are the fastest option for most users.
2. Free Photo Editors in the Browser
Tools such as Photopea or similar browser-based editors allow manual transparency adjustments.
3. Simple Colour Removal Tools
Some free sites let you click a colour to make it transparent, which works well for solid backgrounds.
Step-by-Step: Make an Image Transparent Online
- Open a free online background remover or photo editor.
- Upload your image.
- Let the tool automatically remove the background, or manually select the area.
- Adjust edges if needed for cleaner results.
- Preview the image on a different background.
- Download the file as a PNG to preserve transparency.
Tips for Better Transparency Results
- Start with a high-resolution image
- Use images with clear contrast between subject and background
- Manually refine edges on important images
- Avoid heavily compressed or low-quality source files
- Check the result on both light and dark backgrounds
- Save as PNG rather than JPG to keep transparency
Common Issues and Fixes
Rough or jagged edges
Use manual refinement tools or a higher-quality source image.
Parts of the subject removed
Switch to a tool with better subject detection or edit manually.
Transparency not saving
Make sure you download the file in PNG format.
Large file size
Reduce image dimensions slightly before uploading if the tool has size limits.
Free vs Paid Transparency Tools
| Feature | Free Online Tools | Paid Tools |
|---|---|---|
| Speed | Fast | Fast |
| Edge quality | Good for simple images | Better for complex images |
| Manual control | Limited | Advanced |
| Batch processing | Rare | Common |
| Watermarks | Sometimes | Usually none |
Transparent Background vs Lower Opacity
People use “make an image transparent” to mean two different things, and the right tool depends on which one you need:
| Goal | What happens | Typical use | Tool feature |
|---|---|---|---|
| Transparent background | The background disappears completely, the subject stays solid | Logos, product photos, stickers, profile pictures | Background remover or eraser |
| Lower opacity | The whole image becomes partly see-through | Watermarks, overlays, faded backgrounds in designs | Opacity or transparency slider |
| Remove one colour | A single colour, such as white, becomes transparent | Simple logos and icons on plain backgrounds | Colour removal or “magic wand” |
If you need a logo to sit cleanly on a coloured website header, you want a transparent background. If you want a photo to appear faded behind text, you want lower opacity.
Which File Formats Support Transparency?
| Format | Supports transparency? | Notes |
|---|---|---|
| PNG | Yes, with smooth edges | Best all-round choice for logos, graphics and cut-out photos |
| WebP | Yes | Smaller files, widely supported by modern browsers |
| GIF | Yes, but only fully on or fully off | Edges can look jagged, and colours are limited |
| SVG | Yes | Vector format for logos and icons, not for photos |
| JPG or JPEG | No | Transparent areas are filled with white or another colour |
A common mistake is removing the background correctly and then saving as JPG, which brings back a solid background. Always check the export format.
Free Built-In Options on Your Devices
You may not need a website at all:
- Windows 11 Paint: Recent versions include a Remove background button that cuts out the main subject in one click.
- Mac Preview: The Instant Alpha tool in the markup toolbar removes areas of similar colour. Finder on recent versions of macOS also offers a Remove Background quick action when you right-click an image.
- iPhone and iPad: In Photos, touch and hold the subject of an image to lift it from the background, then copy or share it as a cut-out.
- Free desktop editors: GIMP and Photopea (in the browser) let you add an alpha channel and erase areas manually for full control.
Step-by-Step: Make a Logo Background Transparent
Logos usually sit on a plain white or coloured background, which makes them ideal for colour removal:
- Open the logo in a browser editor such as Photopea or a background remover.
- If using an editor, unlock the layer or add an alpha channel so transparency is possible.
- Select the Magic Wand tool and click the background colour.
- Adjust the tolerance so it selects the background without eating into the logo.
- Press Delete to remove the selected area. A checkerboard pattern shows transparency.
- Zoom in and tidy any remaining pixels around the edges.
- Export as PNG at the size you need.
Step-by-Step: Make a Product Photo Transparent
Product photos often have shadows, reflections and fine details:
- Upload the photo to an AI background remover.
- Check the cut-out at full zoom, paying attention to edges, transparent parts such as glass and small gaps such as handles.
- Use the Restore brush to bring back parts that were removed by mistake.
- Use the Erase brush to remove leftover background.
- Add a soft shadow if the tool offers it, so the product does not look like it is floating.
- Download as PNG, or WebP if the image is going straight onto a website.
How to Lower the Opacity of an Image Online
- Open a browser design tool such as Canva, Adobe Express or Photopea.
- Upload the image and select it.
- Find the Transparency or Opacity setting, often shown as a percentage or slider.
- Reduce the value until the image is as faint as you need.
- Export as PNG to keep the transparency, or flatten it onto a background if transparency is not needed.
Getting Clean Edges on Difficult Images
- Hair and fur: Use tools with a “refine edge” or hair detail option, and choose a source photo with a plain, contrasting background.
- Glass and water: These are partly see-through in real life. Automatic tools may remove them entirely, so restore them manually with a lower opacity brush if needed.
- Low-resolution images: Upscale carefully before removing the background, as small images give the AI less detail to work with.
- White products on white backgrounds: Edges are hard to detect. If possible, reshoot on a contrasting colour.
- Halos: A thin outline of the old background can remain. Many editors offer a “defringe” or “shrink selection” option to remove it.
Using Transparent Images Correctly
- Websites: Use PNG or WebP and check how the image looks on both light and dark backgrounds.
- Social media: Some platforms flatten transparency onto white or black when you upload, so preview before posting.
- Printing: Print shops may prefer PDF or high-resolution PNG files. Ask what they need.
- Presentations and documents: PNG files with transparent backgrounds sit neatly on coloured slides in PowerPoint, Keynote and Google Slides.
Privacy and Copyright Reminders
- Avoid uploading personal or confidential photos to unfamiliar websites.
- Check whether the site deletes uploaded files and whether it uses them to train its models.
- Only edit and publish images you own or have permission to use. Removing a background does not change who owns the image.
Key Takeaways
- You can make images transparent online for free using AI background removers and browser editors.
- PNG is the best format for preserving transparency.
- Clear, high-contrast images produce the best automatic results.
- Manual refinement improves quality for important graphics.
- Free tools are sufficient for most personal and basic professional needs.
- Decide whether you need a transparent background or lower opacity, as they require different tools.
- Windows Paint, Mac Preview and iPhone Photos include free background removal features.
Frequently Asked Questions
What is the easiest way to make an image transparent online?
Using a free AI background remover website is the fastest and easiest method for most people.
Which file format supports transparency?
PNG is the most common format that supports transparency. JPG does not.
Can I make only part of an image transparent?
Yes. Advanced free editors and paid tools allow you to select specific areas to make transparent.
Are free online transparency tools safe?
Most reputable tools are safe for general images. Avoid uploading sensitive or private photos to unknown websites.
How do I make a picture background transparent for free?
Upload the picture to a free background remover such as Adobe Express or remove.bg, or use the Remove background button in Windows 11 Paint. The tool erases the background automatically. Check the edges, fix any mistakes with the restore or erase brush, and download the result as a PNG file.
Why does my transparent image have a white background?
The image was most likely saved as JPG, which cannot store transparency, so the empty areas were filled with white. Export it again as PNG or WebP. Some apps and social platforms also add a background when displaying images, even if the file itself is transparent.
Can I make an image transparent in Google Slides?
Yes. Select the image, open Format options and use the Transparency slider under Adjustments to lower its opacity. Google Slides does not remove backgrounds automatically, so for a cut-out subject, remove the background in another tool first and insert the transparent PNG.
What is the difference between PNG-8 and PNG-24 transparency?
PNG-24, often listed as PNG-32 when transparency is included, supports smooth, partial transparency, which gives soft and natural edges. PNG-8 offers a limited colour palette and simpler transparency, which can cause jagged edges. For logos and photos with smooth edges, choose the higher-quality PNG option.






Leave a Reply